#ASK ME TO SET UP A QEMU VM
Explore tagged Tumblr posts
Text
i think i do my best Posting when i have a lot going on at work so if you want to see good posts from me then idk log some Jira tickets i guess
#ASK ME TO SET UP A QEMU VM#I FUCKING LOVE SETTING UP QEMU VMS#I LOVE INSTALLING DEBIAN GNU SLASH LINUX
2 notes
·
View notes
Text
Linux Life Episode 86

Hello everyone back to my Linux Life blog. I admit it has been a while since I wrote anything here . I have continued to use EndeavourOS on my Ryzen 7 Dell laptop. If I any major incidents had came up I would have made an entry.
However nothing really exciting has transpired. I update daily and OK have had a few minor issues but nothing that couldn't be sorted easily so not worth typing up a full blog just for running a yay command which sorted things out.
However given it's March, which some You-tubers and content creators have been running with the hashtag of #Marchintosh in which they look at old Mac stuff.
So I decided to run some older versions of Mac OS using VMWare Workstation which is now free for Windows, Mac and Linux.
For those not up with the technology of Virtual Machines basically the computer creates a sandbox container which pretends to be a certain machine so you can run things like Linux and MacOS using a software created environment.
VMWare Workstation and Oracle Virtualbox are Type 2 Hypervisors as they are known which create the whole environment using software machines which you can configure. All drivers are software based.
Microsoft Hyper-V, Xen and others such as QEMU are Type 1 Hypervisors which as well as having the various environments have software drivers some can use what they call "bare metal" which means it can see and use your actual GPU meaning you can take advantage of video acceleration. It also can give bare metal access to keyboards and mice. These take a lot more setup but work slightly quicker than Type 2 once they are done.
Type 1 systems like Qemu and Bochs may also allow access to different CPU types such as SPARC, PowerPC so you can run alternative OS like Solaris, IRIX and others.
Right now i have explained that back to the #Marchintosh project I was using VMWare Workstation and I decided to install 2 versions of Mac OS.
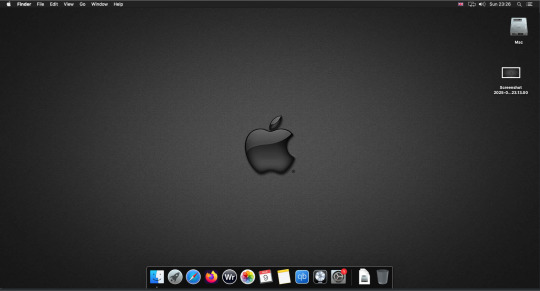
First I installed Mac OS Catalina (Mac OS X 10.15) now luckily a lot of the leg work had been taken out for me as someone had already created a VMDK file (aka virtual Hard drive) of Catalina with AMD drivers to download. Google is your friend I am not putting up links.
So first you have to unlock VMWare as by default the Windows and Linux versions don't list Mac OS. You do this by downloading a WMWare unlocker and then running it. It will make patch various files to allow it to now run MacOS.
So upon creating the VM and selecting Mac OS 10.15 from options you have to first setup to install the OS later and then when it asks to use a HD point it towards the Catalina AMD VDMK previously downloaded (keep existing format). Set CPUs to 2 and Cores to 4 as I can. Memory set to 8GB, Set networking to NAT and everything else as standard. Selecting Finish.
Now before powering on the VM as I have an AMD Ryzen system I had to edit the VM's VMX file using a text editor.
cpuid.0.eax = “0000:0000:0000:0000:0000:0000:0000:1011” cpuid.0.ebx = “0111:0101:0110:1110:0110:0101:0100:0111” cpuid.0.ecx = “0110:1100:0110:0101:0111:0100:0110:1110” cpuid.0.edx = “0100:1001:0110:0101:0110:1110:0110:1001” cpuid.1.eax = “0000:0000:0000:0001:0000:0110:0111:0001” cpuid.1.ebx = “0000:0010:0000:0001:0000:1000:0000:0000” cpuid.1.ecx = “1000:0010:1001:1000:0010:0010:0000:0011” cpuid.1.edx = “0000:0111:1000:1011:1111:1011:1111:1111” smbios.reflectHost = "TRUE" hw.model = "iMac19,1" board-id = "Mac-AA95B1DDAB278B95"
This is to stop the VM from locking up as it will try and run an Intel CPU setup and freeze. This is the prevention of this happening by making it think its a iMac 19,1 in this case.
Now you need to create a harddrive in the VM settings to install the OS on by editing the settings in VMWare and adding a hard drive in my case 100GB set as one file. Make sure it is set to SATA 0:2 using the Advanced button.
Now power on the VM and it will boot to a menu with four options. Select Disk Utility and format the VMware drive to APFS. Exit Disk Utility and now select Restore OS and it will install. Select newly formatted drive and Agree to license.
It will install and restart more than once but eventually it will succeed. Setup language, Don't import Mac, skip location services, skip Apple ID, create account and setup icon and password. don't send Metrics, skip accessibility.
Eventually you will get a main screen with a dock. Now you can install anything that doesn't use video acceleration. So no games or Final Cut Pro but can be used a media player for Youtube and Logic Pro and Word processing.
There is a way of getting iCloud and Apple ID working but as I don't use it I never did bother. Updates to the system are at your own risk as it can wreck the VM.
Once installed you can power down VM using the Apple menu and remove the Catalina VMDK hard drive from the settings. It provide all the fixed kexts so keyboards, mice and sound should work.
If you want video resolution you can install VMware Tools and the tools to select are the ones from the unlocker tools.
Quite a lot huh? Intel has a similar setup but you can use the ISOs and only need to set SMC.version="0" in the VMX.

For Sonoma (Mac OS 14) you need to download OpenCore which is a very complicated bootloader created by very smart indivials normally used to create Hackintosh setups.
It's incredibly complex and has various guides the most comprehensive being the Dortania Opencore guide which is extensive and extremely long.
Explore so at your own risk. As Sonoma is newer version the only way to get it running on AMD laptops or Desktops in VMWare is to use Opencore. Intel can do fixes to the VMX to get it work.
This one is similar to the previous I had to download an ISO of Sonoma. Google is your friend but here is a good one on github somewhere (hint hint). In my case I downloaded Sonoma version 14.7_21H124 (catchy I know).
I also had to download a VDMK of Opencore that allowed 4 cores to be used. I found this on AMD-OSX as can you.
The reason I chose this ISO as you can download Sequioa one. I tried Sequioa but could not get sound working.
So for this one create VM , Select Mac OS 14, install operating system later. Existing OS select Opencore VDMK (keep existing format), set CPU to 1 and cores to 4. Set Netwoking as Bridged everything else as normal. Finish
Now edit settings on VM. On CD-Rom change to image and point to downloaded Sonoma ISO. Add Second hard drive to write to once again I selected 100GB one file. Make sure it is set to SATA 0:2 using the Advanced button. Make sure Opencore is set to SATA 0:0 also using same button.
Now Power the VM. It will boot to a menu with four options. Select Disk Utility and format the VMware drive to APFS. Exit Disk Utility and now select Install OS and it will install. Select newly formatted drive and Agree to license.
The System will install and may restart several times if you get a halt then Restart Guest using the VMware buttons. It will continue until installed.
Setup as done in Catalina turning off all services and creating account. Upon starting of Mac you will have a white background.
Go to System Settings and Screen Saver and turn off Show as Wallpaper.
Now Sonoma is a lot more miserable about installing programs from the Internet and you will spend a lot of time in the System setting Privacy and Security to allow things.
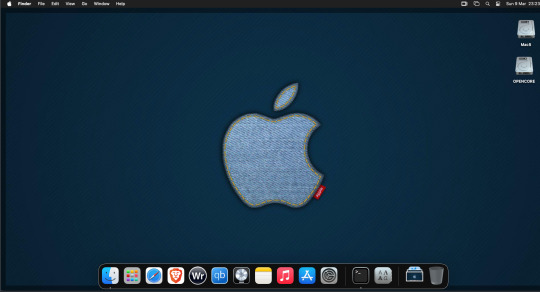
I installed OpenCore Auxilary Tools and managed to install it after the security nonsense. I then turned on Hard Drives in Finder by selecting Settings.
Now open OPENCORE and open EFI folder then OC folder. Start OCAT and drag config.plist from folder to it. In my case to get sound I had to use VoodooHDA but yours may vary.
The VoodooHDA was in the Kernel tab of OCAT I enabled it and disabled AppleALC. Save and exit. Reboot VM and et voila I had sound.
Your mileage may vary and you may need different kexts depending on soundcard or MAC OS version.
Install VMTools to get better Screen resolution. Set Wallpaper to static rather than dynamic to get better speed.
Close VM edit settings and remove CD iso by unticking connected unless you have a CD drive I don't. DO NOT remove Opencore as it needs that to boot.
And we are done. What a nightmare but fascinating to me. If you got this far you deserve a medal. So ends my #Marchintosh entry.
Until next time good luck and take care
2 notes
·
View notes